-
4WD and Off-Road Accessories
-

Brake Controllers and Accessories
-

CB/UHF Radios and Accessories
-

GPS Navigation
-

Vehicle Antennas
-

Dual Battery Accessories
-

Solar Panels and Regulators
-

4WD Recovery Gear
-

Battery Accessories
-

Switches and Power Accessories
-
TV Mounts
-

Communication
-
Drawer Systems
-
Fridge Mounting Systems
-
Lifestyle
-
Tourer Pack
-
Tradie Gear
-
Towing Accessories
-
Wind Turbine
-
Water Bras
-
Small Accessories
-
Basket Packs


4WD and Caravan Accessories
-

RFI RFI MMB14-5M-NC MB14 Magnetic Antenna Base with 5m Low Loss RG58 Cable
RFI MMB14-5M-NC MB14 Magnetic Antenna Base with 5m Low Loss RG58 Cable - Professional Portable Magnetic Mount with Rubber Boot Paint Protection, 1/4 UNF Thread, and Unterminated Cable for Temporary UHF CB Installations Achieve portable professional UHF CB antenna mounting with RFI MMB14-5M-NC Magnetic Antenna Base—featuring powerful magnetic mounting platform enabling secure antenna installation without drilling or permanent vehicle modifications, moulded MB14 style antenna base providing reliable connection point for antennas with 1/4 UNF male thread configurations, included 5m low loss RG58 (9014) coaxial cable providing professional-grade signal transmission with adequate routing length, unterminated cable configuration allowing custom connector installation matching specific radio requirements, included rubber boot protecting vehicle paintwork from magnetic base contact preventing scratches or finish damage, portable transferable design enabling easy antenna relocation between multiple vehicles for fleet applications or shared equipment, powerful magnetic attachment providing secure mounting during normal vehicle operation including highway speeds, universal vehicle compatibility suitable for any vehicle with steel roof panel or magnetic mounting surface, ideal for temporary installations, rental vehicles, demonstrations, or situations requiring non-permanent antenna mounting, and proven RFI quality engineering delivering reliable portable antenna mounting solution for mobile UHF CB communication requiring installation flexibility without permanent vehicle modifications. Product Overview Magnetic Base with moulded MB14 style antenna base with 5m of low loss RG58 (9014) cable. Suit antennas with 1/4 UNF male thread. Includes rubber boot to protect the vehicles paint work. Allows antennas to be transferred from car to car with ease. Key Features Powerful Magnetic Mounting Platform - Strong magnetic base provides secure antenna mounting on steel vehicle surfaces without drilling enabling portable temporary installations. Moulded MB14 Style Antenna Base - Professional antenna connection point accommodating antennas with 1/4 UNF male thread configurations ensuring reliable mounting. 5m Low Loss RG58 (9014) Cable - Included 5-meter low loss coaxial cable provides professional-grade signal transmission with adequate length for routing to radio installation. Included Rubber Boot Paint Protection - Protective rubber boot prevents magnetic base contact with vehicle paintwork eliminating scratches or finish damage during installation and use. Unterminated Cable for Custom Installation - Cable supplied without connector allowing professional custom termination matching specific radio connector requirements. Portable Transferable Design - Easy antenna relocation between multiple vehicles ideal for fleet applications, rental vehicles, demonstrations, or shared equipment scenarios. Technical Specifications Specification Details Model MMB14-5M-NC SKU MMB14-5M-NC Brand RFI Product Type Magnetic Antenna Base with Cable Base Style MB14 moulded antenna base Mounting Type Magnetic (no drilling required) Antenna Thread 1/4 UNF male (antennas with 1/4 UNF male thread) Cable Type Low Loss RG58 (9014) Cable Length 5 meters Cable Termination No connector (unterminated) Paint Protection Rubber boot included Vehicle Compatibility Universal (vehicles with steel roof panels or magnetic surfaces) Antenna Compatibility Antennas with 1/4 UNF male thread Installation Type Portable magnetic mounting (temporary, non-permanent) Component Type Magnetic Antenna Base Portability Transferable between vehicles Application Temporary antenna mounting, Portable installations, Fleet vehicles, Rental vehicles, Demonstrations Frequently Asked Questions Q: What vehicles are compatible with MMB14-5M-NC magnetic base? A: MMB14-5M-NC requires steel roof panel for magnetic attachment—compatible with most vehicles featuring steel roofs including sedans, wagons, hatchbacks, utes, and 4WD vehicles. Not compatible with aluminum, fiberglass, or composite roof panels lacking magnetic properties. Modern vehicles increasingly use aluminum roofs—verify roof panel material before purchase. Test magnetic attraction at proposed mounting location confirming adequate magnetic hold. Q: Will magnetic base damage vehicle paint? A: MMB14-5M-NC includes rubber boot protecting vehicle paintwork from direct magnetic base contact preventing scratches. Ensure roof surface clean before installation removing dirt and debris potentially trapped between boot and paint causing scratches. Periodically remove base checking for trapped contaminants. Rubber boot protects finish during normal use—proper installation and maintenance prevents paint damage. Q: Is magnetic mounting secure at highway speeds? A: MMB14-5M-NC designed for secure mounting during normal vehicle operation including highway speeds when properly installed on steel roof. Magnetic hold adequate for typical UHF CB antennas during highway travel. Verify antenna secured properly and magnetic base positioned on clean flat steel surface. Extreme speeds, severe weather, or very tall heavy antennas may require permanent mounting solutions. Periodically verify secure attachment especially after highway travel. Q: What antennas are compatible with 1/4 UNF male thread? A: MMB14-5M-NC accommodates antennas with 1/4 UNF male thread—common thread size for many UHF CB antennas particularly shorter mobile and magnetic base antennas. Verify antenna thread specification before purchase ensuring 1/4 UNF compatibility. Some antennas use different thread sizes (3/8 inch, PL259) not compatible with MMB14. Check antenna specifications or test-fit antenna ensuring proper thread engagement. Q: How do I terminate the unterminated cable? A: MMB14-5M-NC 5m RG58 cable unterminated requiring connector installation. Terminate with PL259 male connector (UHF plug) matching most mobile UHF CB radios. Purchase quality PL259 connector appropriate for RG58 cable. Installation requires cable stripping tools, soldering iron or crimping tool, and connector assembly following manufacturer instructions. Consider professional installation if unfamiliar with coax termination. Alternatively, purchase pre-terminated magnetic base version if available avoiding custom connector installation.Legendary Products & Support From Authorized Dealers When you choose Frankies BrandBeast, you're choosing quality and performance. But just as important as what you buy is where you buy it from. Here's why purchasing from an authorized dealer is always the right choice: ▸ Expert Knowledge & TrainingOnly authorized Frankies BrandBeast dealers are factory-trained to sell and install our products. They have the expertise to ensure your purchase is set up correctly and meets your expectations. ▸ Authorized Warranty ProtectionWe offer one of the best warranties in the industry, but only purchases made through authorized dealers are covered. Don’t be misled by unauthorized sellers who can’t provide genuine warranty support. ▸ Reliable Customer SupportIf you ever run into an issue, you’re backed by Frankies BrandBeast’s official manufacturer’s warranty. No need to deal with overseas returns—our local team takes care of everything quickly and efficiently. ▸ Protect Your InvestmentBuying from an authorized dealer ensures you’re getting genuine products, full warranty coverage, and expert support. Ask yourself—is saving a few bucks worth losing all that? Choose wisely. Buy from Frankies BrandBeast today!
$128.00
-

RFI RFI MB10-00-23U-A UHF Antenna Base with 5m RG58 Cable FME(F) and UHF(M) Adaptor
RFI MB10-00-23U-A UHF Antenna Base with 5m RG58 Cable FME(F) and UHF(M) Adaptor - Professional 30mm Diameter Roof or Bracket Mount with Pre-Terminated Cable and Universal Radio Compatibility Achieve professional UHF CB antenna installation with RFI MB10-00-23U-A UHF Antenna Base featuring pre-terminated cable and adaptor—featuring compact 30mm diameter design maintaining minimal roof profile while providing secure antenna mounting platform, versatile mounting options accommodating bracket installation or direct roof mounting based on vehicle configuration and installer preferences, blind hole mounting capability requiring only 20mm hole eliminating need for interior access or visible mounting hardware, included 5m RG58 coaxial cable pre-terminated with FME(F) connector providing professional factory termination, supplied UHF(M) adaptor enabling immediate connection to standard UHF CB radios without additional connector installation, popular MB10 design proven across thousands of Australian vehicle installations, professional-grade construction resisting environmental degradation and maintaining reliable antenna connection, universal UHF CB antenna compatibility accommodating spring bases and fixed-mount antennas with standard PL259 thread configurations, suitable for sedans, wagons, hatchbacks, utes, and 4WD vehicles requiring professional roof-mounted or bracket-mounted antenna installations, and proven RFI quality engineering delivering reliable ready-to-install antenna base solution for mobile UHF CB communication systems. Product Overview RFI MB10 UHF Base with 5m RG58 cable terminated with FME(F) connector & supplied with UHF(M) adaptor. The MB10 UHF mobile base mounts on a bracket or through the roof. It measures only 30mm in diameter and requires a 20mm hole for blind mounting. Key Features Compact 30mm Diameter Design - Popular compact profile measuring only 30mm diameter maintaining minimal roof visual impact while providing secure UHF antenna mounting platform. Pre-Terminated 5m RG58 Cable with FME(F) Connector - Included 5-meter RG58 coax cable factory-terminated with FME(F) connector providing professional connection without requiring custom termination. Supplied UHF(M) Adaptor for Universal Radio Compatibility - Included UHF(M) adaptor converts FME(F) cable termination to standard UHF connection matching most mobile CB radios. Blind Hole Mounting Capability - Requires only 20mm hole for blind hole installation eliminating need for interior access or visible mounting hardware inside vehicle. Versatile Mounting Options - Accommodates bracket installation or direct roof mounting providing installation flexibility based on vehicle configuration and mounting preferences. Universal UHF CB Antenna Compatibility - Standard mounting configuration accommodates most UHF CB antennas with conventional PL259 thread configurations including spring bases and fixed mounts. Technical Specifications Specification Details Model MB10-00-23U-A SKU MB10-00-23U-A Brand RFI Product Type UHF Antenna Base with Pre-Terminated Cable and Adaptor Diameter 30mm Mounting Hole Required 20mm (for blind hole mounting) Mounting Options Bracket mount or roof mount (through-hole) Cable Type RG58 Cable Length 5 meters Cable Termination FME(F) connector (Female) Included Adaptor UHF(M) adaptor Antenna Thread Standard UHF (PL259 compatible) Vehicle Compatibility Universal (sedans, wagons, hatchbacks, utes, 4WD vehicles) Antenna Compatibility UHF CB antennas with standard PL259 threads Installation Type Blind hole mounting or bracket mounting Component Type Antenna Base Application Roof mounting, Bracket mounting, UHF CB antenna installation, Mobile antenna base Frequently Asked Questions Q: What is the difference between MB10-00-23U-A and MB10-00-23? A: MB10-00-23U-A and MB10-00-23 identical antenna bases—sole difference is cable termination. MB10-00-23U-A includes 5m RG58 cable pre-terminated with FME(F) connector plus UHF(M) adaptor ready for immediate radio connection. MB10-00-23 includes 5m RG58C/U cable without connector requiring professional termination. Choose MB10-00-23U-A for ready-to-install convenience avoiding custom connector installation. Choose MB10-00-23 when custom cable length or specific connector type required. Q: What is FME connector and why is UHF adaptor included? A: FME (For Mobile Equipment) connector compact professional connection commonly used in mobile antenna installations. Cable terminated with FME(F) female connector. Most mobile UHF CB radios use standard UHF/PL259 connectors—included UHF(M) male adaptor converts FME(F) to standard UHF connection enabling direct radio connection. Simply connect FME cable to UHF adaptor, then connect adaptor to radio antenna socket. No additional connectors or termination required. Q: Is pre-terminated cable better than unterminated? A: MB10-00-23U-A pre-terminated cable offers installation convenience—factory termination ensures professional connection quality, eliminates need for connector crimping/soldering skills, ready-to-install saving installation time. Benefits for DIY installers or those without connector termination experience. Unterminated MB10-00-23 offers flexibility for custom cable length adjustment or specific connector requirements. Choose pre-terminated for convenience, unterminated for customization. Q: Can I use MB10-00-23U-A without the UHF adaptor? A: Yes—if radio features FME antenna connection (less common), connect cable directly without adaptor. Most mobile UHF CB radios use standard UHF/PL259 antenna sockets requiring included UHF(M) adaptor for connection. Adaptor included ensuring compatibility with standard radios. FME connection without adaptor suitable for specific equipment using FME antenna inputs or when integrating into systems with FME connectivity. Q: Is 5m cable length adequate and can it be shortened? A: 5m adequate for most vehicle roof to dashboard installations including sedans, wagons, hatchbacks, and utes. Measure routing path from roof location to radio confirming sufficient length. Pre-terminated cable can be shortened if excessive length problematic—requires cutting cable and re-terminating with new FME or UHF connector. However, shortening eliminates pre-termination advantage. Consider cable routing management (coiling excess under dash) rather than cutting maintaining factory termination quality.Legendary Products & Support From Authorized Dealers When you choose Frankies BrandBeast, you're choosing quality and performance. But just as important as what you buy is where you buy it from. Here's why purchasing from an authorized dealer is always the right choice: ▸ Expert Knowledge & TrainingOnly authorized Frankies BrandBeast dealers are factory-trained to sell and install our products. They have the expertise to ensure your purchase is set up correctly and meets your expectations. ▸ Authorized Warranty ProtectionWe offer one of the best warranties in the industry, but only purchases made through authorized dealers are covered. Don’t be misled by unauthorized sellers who can’t provide genuine warranty support. ▸ Reliable Customer SupportIf you ever run into an issue, you’re backed by Frankies BrandBeast’s official manufacturer’s warranty. No need to deal with overseas returns—our local team takes care of everything quickly and efficiently. ▸ Protect Your InvestmentBuying from an authorized dealer ensures you’re getting genuine products, full warranty coverage, and expert support. Ask yourself—is saving a few bucks worth losing all that? Choose wisely. Buy from Frankies BrandBeast today!
$67.60
-

RFI RFI MB10-00-23 UHF Antenna Base with 5m RG58C/U Cable
RFI MB10-00-23 UHF Antenna Base with 5m RG58C/U Cable - Professional 30mm Diameter Roof or Bracket Mount UHF CB Antenna Base with Blind Hole Mounting and Unterminated Cable Achieve professional UHF CB antenna installation with RFI MB10-00-23 UHF Antenna Base featuring included cable—featuring compact 30mm diameter design maintaining minimal roof profile while providing secure antenna mounting platform, versatile mounting options accommodating bracket installation or direct roof mounting based on vehicle configuration and installer preferences, blind hole mounting capability requiring only 20mm hole eliminating need for interior access or visible mounting hardware, included 5m RG58C/U coaxial cable providing adequate length for routing from roof to radio installation, unterminated cable configuration allowing professional custom connector installation matching specific radio requirements, popular MB10 design proven across thousands of Australian vehicle installations, professional-grade construction resisting environmental degradation and maintaining reliable antenna connection, universal UHF CB antenna compatibility accommodating spring bases and fixed-mount antennas with standard PL259 thread configurations, suitable for sedans, wagons, hatchbacks, utes, and 4WD vehicles requiring professional roof-mounted or bracket-mounted antenna installations, and proven RFI quality engineering delivering reliable antenna base solution for mobile UHF CB communication systems. Product Overview RFI MB10 UHF Base with 5m RG58C/U cable - no connector. UHF mobile base mounts on a bracket or through the roof. A popular model measuring only 30mm diameter. 20mm hole required for blind hole mounting. Available with or without cable. Key Features Compact 30mm Diameter Design - Popular compact profile measuring only 30mm diameter maintaining minimal roof visual impact while providing secure UHF antenna mounting platform. Versatile Mounting Options - Accommodates bracket installation or direct roof mounting providing installation flexibility based on vehicle configuration and mounting preferences. Blind Hole Mounting Capability - Requires only 20mm hole for blind hole installation eliminating need for interior access or visible mounting hardware inside vehicle. Included 5m RG58C/U Coaxial Cable - Complete with 5-meter RG58C/U coax cable providing adequate length for routing from roof mounting location to radio installation. Unterminated Cable for Custom Installation - Cable supplied without connector allowing professional custom termination matching specific radio connector requirements and installation preferences. Universal UHF CB Antenna Compatibility - Standard mounting configuration accommodates most UHF CB antennas with conventional PL259 thread configurations including spring bases and fixed mounts. Technical Specifications Specification Details Model MB10-00-23 SKU MB10-00-23 Brand RFI Product Type UHF Antenna Base with Cable Diameter 30mm Mounting Hole Required 20mm (for blind hole mounting) Mounting Options Bracket mount or roof mount (through-hole) Cable Type RG58C/U Cable Length 5 meters Cable Termination No connector (unterminated) Antenna Thread Standard UHF (PL259 compatible) Vehicle Compatibility Universal (sedans, wagons, hatchbacks, utes, 4WD vehicles) Antenna Compatibility UHF CB antennas with standard PL259 threads Installation Type Blind hole mounting or bracket mounting Component Type Antenna Base Application Roof mounting, Bracket mounting, UHF CB antenna installation, Mobile antenna base Frequently Asked Questions Q: What does "no connector" mean for MB10-00-23? A: MB10-00-23 includes 5m RG58C/U cable without connector termination—cable ends unterminated allowing professional custom connector installation. Installer terminates cable with appropriate connector matching specific radio requirements (typically PL259 male connector for UHF radios). Benefits: custom cable length adjustment by trimming excess, professional connector installation ensuring proper termination, flexibility matching various radio connector types. Requires connector crimping or soldering skills and appropriate connectors purchased separately. Q: What is blind hole mounting and how does it work? A: Blind hole mounting installs antenna base through single 20mm hole drilled in roof without interior access required. Base mounts from exterior with internal threads or retention mechanism securing from topside only. Benefits: no interior headliner removal required, no visible mounting hardware inside vehicle, simplified installation process. Drill 20mm hole at desired roof location, install MB10 base from exterior, tighten securing mechanism, mount antenna. Verify roof structure at mounting location adequate without underlying obstructions. Q: Can MB10-00-23 be bracket mounted instead of roof mounted? A: Yes—MB10 accommodates bracket mounting as alternative to direct roof installation. Mount MB10 base on suitable bracket (fender bracket, mirror bracket, bull bar bracket) using appropriate hardware. 30mm diameter base requires bracket with corresponding mounting provision. Bracket mounting benefits: avoids roof drilling, relocatable antenna positioning, suitable for vehicles where roof mounting impractical. Verify bracket provides adequate antenna height and ground plane for optimal UHF performance. Q: Is 5m cable length adequate for roof to radio installation? A: 5m (approximately 16 feet) cable length adequate for most vehicle roof to dashboard radio installations including sedans, wagons, hatchbacks, and utes. Measure routing path from proposed roof mounting location through A-pillar or other entry point to radio position confirming 5m sufficient with adequate slack for connections. Larger vehicles or complex routing may require longer cable—RFI offers MB10 versions with different cable lengths or consider cable extension. Q: What connector do I need to terminate the cable? A: Terminate 5m RG58C/U cable with PL259 male connector (UHF plug) matching most mobile UHF CB radios. Purchase quality PL259 connector appropriate for RG58 cable from automotive or radio electronics supplier. Installation requires: cable stripping tools, soldering iron (for solder-type connectors) or crimping tool (for crimp-type), connector assembly following manufacturer instructions. Consider professional installation if unfamiliar with coax connector termination ensuring proper connection and preventing signal loss.Legendary Products & Support From Authorized Dealers When you choose Frankies BrandBeast, you're choosing quality and performance. But just as important as what you buy is where you buy it from. Here's why purchasing from an authorized dealer is always the right choice: ▸ Expert Knowledge & TrainingOnly authorized Frankies BrandBeast dealers are factory-trained to sell and install our products. They have the expertise to ensure your purchase is set up correctly and meets your expectations. ▸ Authorized Warranty ProtectionWe offer one of the best warranties in the industry, but only purchases made through authorized dealers are covered. Don’t be misled by unauthorized sellers who can’t provide genuine warranty support. ▸ Reliable Customer SupportIf you ever run into an issue, you’re backed by Frankies BrandBeast’s official manufacturer’s warranty. No need to deal with overseas returns—our local team takes care of everything quickly and efficiently. ▸ Protect Your InvestmentBuying from an authorized dealer ensures you’re getting genuine products, full warranty coverage, and expert support. Ask yourself—is saving a few bucks worth losing all that? Choose wisely. Buy from Frankies BrandBeast today!
$45.70
-

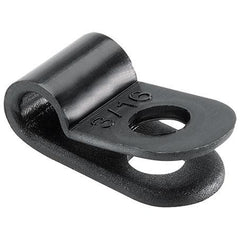
RFI RFI BBWM-45-B Black Stainless Steel Wrap Around Bull Bar Bracket
RFI BBWM-45-B Black Stainless Steel Wrap Around Bull Bar Bracket - Professional 45mm Diameter Bull Bar Antenna Mount with 6mm Cable Slot, Dual Bolt Installation, and Security Locking Screw Achieve secure professional bull bar antenna mounting with RFI BBWM-45-B Black Stainless Steel Wrap Around Bracket—featuring vehicle-specific 45mm diameter bull bar compatibility ensuring precise fitment on small-diameter Australian bull bar tubing, heavy-duty 3mm stainless steel construction providing exceptional mounting strength and long-term durability for demanding off-road and highway conditions, professional black powder-coated finish enhancing corrosion protection and complementing modern 4WD vehicle aesthetics, innovative wrap-around design encircling bull bar tube providing superior mounting security and load distribution compared to standard clamp brackets, integrated 6mm cable slot simplifying antenna installation and cable management eliminating separate routing requirements, dual installation bolts distributing mounting loads across wrap-around design ensuring stable secure attachment, security locking screw preventing unauthorized antenna removal or theft protecting valuable communication equipment, professional-grade stainless steel resisting rust and corrosion in Australian coastal and outback environments, universal UHF CB antenna compatibility accommodating spring bases and fixed-mount configurations, part of comprehensive BBWM range offering bull bar bracket options for 45mm, 50mm, 63mm, 73mm, and 76mm diameter applications, and proven RFI quality engineering delivering reliable purpose-built bull bar antenna mounting solution for 4WD touring, commercial vehicles, and off-road communication installations. Product Overview Black powder coated wrap around stainless steel bull bar bracket with 6mm cable slot for ease of antenna mounting. Specifically manufactured to mount antennas onto 45mm diameter bull bars, the BBWM-45 features 3mm black powder coated stainless steel construction, 6mm cable slot, dual installation bolts and security locking screw. The BBWM range cater for bars of 45, 50, 63 and 73mm diameters. Key Features Vehicle-Specific 45mm Bull Bar Diameter Compatibility - Precisely engineered for 45mm diameter bull bar tubes ensuring proper fitment on small-diameter Australian bull bar configurations. Heavy-Duty 3mm Stainless Steel Construction - Robust 3mm stainless steel material provides exceptional mounting strength and structural rigidity for demanding off-road and highway antenna installations. Professional Black Powder-Coated Finish - Durable black coating enhances corrosion protection and provides discreet appearance complementing modern 4WD vehicle styling and dark-colored bull bars. Wrap-Around Design for Superior Security - Innovative bracket encircles bull bar tube providing superior mounting stability and load distribution compared to standard clamp-style brackets. Integrated 6mm Cable Slot with Dual Bolt Installation - Built-in cable slot simplifies antenna installation while dual installation bolts distribute mounting loads ensuring stable secure attachment to bull bar. Security Locking Screw Anti-Theft Protection - Integrated security locking screw prevents unauthorized antenna removal protecting valuable UHF CB communication equipment from theft. Technical Specifications Specification Details Model BBWM-45-B SKU BBWM-45-B Brand RFI Product Type Bull Bar Antenna Bracket (Wrap-Around Design) Material Stainless Steel Material Thickness 3mm (Heavy Duty) Finish Black (Powder-Coated) Design Wrap-around bull bar bracket with cable slot Bull Bar Diameter Compatibility 45mm Cable Slot 6mm Installation Bolts Dual installation bolts (2 included) Security Feature Security locking screw Vehicle Compatibility Universal (4WD vehicles, utes, trucks with 45mm bull bars) Antenna Compatibility Standard UHF CB antennas, Spring base antennas, Fixed mount antennas Component Type Bracket Drilling Required No drilling to bull bar (wrap-around clamp design) Corrosion Protection Black powder-coated finish over stainless steel BBWM Range Available in 45mm, 50mm, 63mm, 73mm, 76mm diameters Application Bull bar antenna mounting, 4WD communication installations, Off-road antenna mounting Frequently Asked Questions Q: What vehicles typically have 45mm diameter bull bars? A: 45mm diameter represents smallest standard size in BBWM range—common on lightweight bull bars for compact SUVs, smaller 4WD vehicles, and aftermarket light-duty protection bars. Less common than 50mm, 63mm, or 76mm sizes. Measure bull bar tube diameter at proposed mounting location confirming 45mm before purchase. Some nudge bars and light-duty protection bars use 45mm tubing prioritizing weight savings over heavy-duty protection. Q: Is 3mm stainless steel necessary for small 45mm bull bars? A: BBWM-45-B maintains 3mm stainless steel construction consistent across entire BBWM range ensuring professional-grade quality regardless of bull bar diameter. Benefits for 45mm application: provides mounting strength exceeding bull bar tube itself, ensures long-term durability and reliability, maintains consistent BBWM quality standards. Heavy-duty bracket construction compensates for smaller bull bar diameter ensuring secure antenna mounting even on lighter bull bar configurations. Q: What is the difference between BBWM-45-B and BBWM-50-B? A: BBWM-45-B and BBWM-50-B identical in construction and features—sole difference is diameter compatibility. BBWM-45-B fits 45mm bull bars (smallest size), BBWM-50-B fits 50mm bull bars. Both: 3mm stainless steel, black powder-coated finish, 6mm cable slot, dual bolts, security screw. Measure bull bar diameter accurately—using 50mm bracket on 45mm bull bar results in loose fitment and inadequate clamping. Select correct BBWM model matching exact bull bar diameter. Q: Can BBWM-45-B fit roof rack crossbars or other 45mm tubes? A: BBWM-45-B designed specifically for 45mm bull bar mounting but wrap-around design potentially adaptable to other 45mm diameter tubes including roof rack crossbars, roll bar tubes, or equipment racks. Verify tube material and wall thickness adequate supporting antenna weight and wind loads. Roof rack application may benefit from elevated antenna position. Ensure mounting location provides adequate structural support and verify antenna installation does not interfere with vehicle operation or roof-mounted equipment. Q: Will BBWM-45-B work on 40mm or 48mm diameter tubes? A: BBWM-45-B specifically engineered for 45mm diameter—not recommended for significantly different sizes. Minor tolerance (±1mm) may work but compromises fitment and security. Tubes under 45mm result in excessive bolt extension and inadequate clamping. Tubes over 45mm prevent proper wrap-around engagement. For 50mm diameter use BBWM-50. Measure tube diameter accurately using calipers and select corresponding BBWM bracket ensuring proper fitment and secure mounting.Legendary Products & Support From Authorized Dealers When you choose Frankies BrandBeast, you're choosing quality and performance. But just as important as what you buy is where you buy it from. Here's why purchasing from an authorized dealer is always the right choice: ▸ Expert Knowledge & TrainingOnly authorized Frankies BrandBeast dealers are factory-trained to sell and install our products. They have the expertise to ensure your purchase is set up correctly and meets your expectations. ▸ Authorized Warranty ProtectionWe offer one of the best warranties in the industry, but only purchases made through authorized dealers are covered. Don’t be misled by unauthorized sellers who can’t provide genuine warranty support. ▸ Reliable Customer SupportIf you ever run into an issue, you’re backed by Frankies BrandBeast’s official manufacturer’s warranty. No need to deal with overseas returns—our local team takes care of everything quickly and efficiently. ▸ Protect Your InvestmentBuying from an authorized dealer ensures you’re getting genuine products, full warranty coverage, and expert support. Ask yourself—is saving a few bucks worth losing all that? Choose wisely. Buy from Frankies BrandBeast today!
$45.00
-

RFI RFI BBWM-50 Polished Stainless Steel Wrap Around Bull Bar Bracket
RFI BBWM-50 Polished Stainless Steel Wrap Around Bull Bar Bracket - Professional 50mm Diameter Bull Bar Antenna Mount with 6mm Cable Slot, Dual Bolt Installation, and Security Locking Screw Achieve secure professional bull bar antenna mounting with RFI BBWM-50 Polished Stainless Steel Wrap Around Bracket—featuring vehicle-specific 50mm diameter bull bar compatibility ensuring precise fitment on compact Australian bull bar tubing, heavy-duty 3mm stainless steel construction providing exceptional mounting strength and long-term durability for demanding off-road and highway conditions, professional polished stainless steel finish offering bright metallic appearance complementing chrome and polished bull bars, innovative wrap-around design encircling bull bar tube providing superior mounting security and load distribution compared to standard clamp brackets, integrated 6mm cable slot simplifying antenna installation and cable management eliminating separate routing requirements, dual installation bolts distributing mounting loads across wrap-around design ensuring stable secure attachment, security locking screw preventing unauthorized antenna removal or theft protecting valuable communication equipment, professional-grade stainless steel resisting rust and corrosion in Australian coastal and outback environments, universal UHF CB antenna compatibility accommodating spring bases and fixed-mount configurations, part of comprehensive BBWM range offering bull bar bracket options for 45mm, 50mm, 63mm, 73mm, and 76mm diameter applications, and proven RFI quality engineering delivering reliable purpose-built bull bar antenna mounting solution for 4WD touring, commercial vehicles, and off-road communication installations. Product Overview Polished wrap around stainless steel bull bar bracket with 6mm cable slot for ease of antenna mounting. Specifically manufactured to mount antennas onto 50mm diameter bull bars, the BBWM-50 features polished 3mm stainless steel construction, 6mm cable slot, dual installation bolts and security locking screw. The BBWM range caters for bars of 45, 50, 63, and 73mm diameters. Key Features Vehicle-Specific 50mm Bull Bar Diameter Compatibility - Precisely engineered for 50mm diameter bull bar tubes ensuring proper fitment on compact Australian bull bar configurations. Heavy-Duty 3mm Stainless Steel Construction - Robust 3mm stainless steel material provides exceptional mounting strength and structural rigidity for demanding off-road and highway antenna installations. Professional Polished Stainless Steel Finish - Bright metallic polished finish provides premium appearance complementing chrome and polished bull bars while maintaining excellent corrosion resistance. Wrap-Around Design for Superior Security - Innovative bracket encircles bull bar tube providing superior mounting stability and load distribution compared to standard clamp-style brackets. Integrated 6mm Cable Slot with Dual Bolt Installation - Built-in cable slot simplifies antenna installation while dual installation bolts distribute mounting loads ensuring stable secure attachment to bull bar. Security Locking Screw Anti-Theft Protection - Integrated security locking screw prevents unauthorized antenna removal protecting valuable UHF CB communication equipment from theft. Technical Specifications Specification Details Model BBWM-50 SKU BBWM-50 Brand RFI Product Type Bull Bar Antenna Bracket (Wrap-Around Design) Material Stainless Steel Material Thickness 3mm (Heavy Duty) Finish Polished Stainless Steel Design Wrap-around bull bar bracket with cable slot Bull Bar Diameter Compatibility 50mm Cable Slot 6mm Installation Bolts Dual installation bolts (2 included) Security Feature Security locking screw Vehicle Compatibility Universal (4WD vehicles, utes, trucks with 50mm bull bars) Antenna Compatibility Standard UHF CB antennas, Spring base antennas, Fixed mount antennas Component Type Bracket Drilling Required No drilling to bull bar (wrap-around clamp design) Corrosion Protection Polished stainless steel (natural corrosion resistance) BBWM Range Available in 45mm, 50mm, 63mm, 73mm, 76mm diameters Application Bull bar antenna mounting, 4WD communication installations, Off-road antenna mounting Frequently Asked Questions Q: What is the difference between BBWM-50 and BBWM-50-B? A: BBWM-50 and BBWM-50-B identical in construction and functionality—sole difference is finish. BBWM-50 features polished stainless steel finish providing bright metallic appearance ideal for chrome or polished bull bars. BBWM-50-B features black powder-coated finish complementing dark-colored or matte black bull bars. Both: 3mm stainless steel, 50mm diameter, 6mm cable slot, dual bolts, security locking screw. Choose BBWM-50 for traditional polished appearance matching chrome accessories. Choose BBWM-50-B for modern matte black aesthetic. Q: What vehicles commonly use 50mm bull bars? A: 50mm diameter common on compact and light-duty bull bars for smaller SUVs, compact 4WD vehicles, and some utes. Lighter bull bar construction compared to 63mm and 76mm heavy-duty options. Popular on aftermarket bull bars for compact SUVs and lighter vehicles prioritizing weight savings. Measure bull bar tube diameter at proposed mounting location confirming 50mm before purchase—verify actual measurement rather than assuming based on vehicle type. Q: Will polished stainless finish match my bull bar? A: BBWM-50 polished stainless steel finish complements chrome, polished stainless, or aluminum bull bars providing coordinated bright metallic appearance. Suitable for traditional 4WD styling with chrome accessories and polished components. If bull bar features powder-coated black or matte finish, consider BBWM-50-B black version for better aesthetic match. Polished finish maintains natural stainless corrosion resistance without coating requiring maintenance. Q: Can BBWM-50 handle heavy or long antennas? A: BBWM-50 3mm stainless steel construction provides heavy-duty mounting strength adequate for standard UHF CB antennas despite 50mm compact bull bar diameter. Suitable for typical 3-7 foot antennas including spring bases and fixed mounts. Wrap-around design with dual bolts and security screw ensures stable mounting. For exceptionally heavy or long antennas (8+ feet), verify 50mm bull bar tube itself provides adequate structural support—bracket construction adequate but mounting surface diameter consideration important. Q: How do I install BBWM-50 without damaging polished finish? A: Position wrap-around bracket on 50mm bull bar tube at desired location. Use appropriate tools avoiding scratching polished bull bar or bracket surfaces. Tighten dual installation bolts progressively ensuring even clamping—avoid over-tightening potentially damaging finishes. Install security locking screw after positioning. Consider using thin protective material between bracket and bull bar if concerned about finish contact, though properly tightened bracket should not damage polished surfaces during normal use.Legendary Products & Support From Authorized Dealers When you choose Frankies BrandBeast, you're choosing quality and performance. But just as important as what you buy is where you buy it from. Here's why purchasing from an authorized dealer is always the right choice: ▸ Expert Knowledge & TrainingOnly authorized Frankies BrandBeast dealers are factory-trained to sell and install our products. They have the expertise to ensure your purchase is set up correctly and meets your expectations. ▸ Authorized Warranty ProtectionWe offer one of the best warranties in the industry, but only purchases made through authorized dealers are covered. Don’t be misled by unauthorized sellers who can’t provide genuine warranty support. ▸ Reliable Customer SupportIf you ever run into an issue, you’re backed by Frankies BrandBeast’s official manufacturer’s warranty. No need to deal with overseas returns—our local team takes care of everything quickly and efficiently. ▸ Protect Your InvestmentBuying from an authorized dealer ensures you’re getting genuine products, full warranty coverage, and expert support. Ask yourself—is saving a few bucks worth losing all that? Choose wisely. Buy from Frankies BrandBeast today!
$47.60
-

RFI RFI BBWM-50-B Black Stainless Steel Wrap Around Bull Bar Bracket
RFI BBWM-50-B Black Stainless Steel Wrap Around Bull Bar Bracket - Professional 50mm Diameter Bull Bar Antenna Mount with 6mm Cable Slot, Dual Bolt Installation, and Security Locking Screw Achieve secure professional bull bar antenna mounting with RFI BBWM-50-B Black Stainless Steel Wrap Around Bracket—featuring vehicle-specific 50mm diameter bull bar compatibility ensuring precise fitment on compact Australian bull bar tubing, heavy-duty 3mm stainless steel construction providing exceptional mounting strength and long-term durability for demanding off-road and highway conditions, professional black powder-coated finish enhancing corrosion protection and complementing modern 4WD vehicle aesthetics, innovative wrap-around design encircling bull bar tube providing superior mounting security and load distribution compared to standard clamp brackets, integrated 6mm cable slot simplifying antenna installation and cable management eliminating separate routing requirements, dual installation bolts distributing mounting loads across wrap-around design ensuring stable secure attachment, security locking screw preventing unauthorized antenna removal or theft protecting valuable communication equipment, professional-grade stainless steel resisting rust and corrosion in Australian coastal and outback environments, universal UHF CB antenna compatibility accommodating spring bases and fixed-mount configurations, part of comprehensive BBWM range offering bull bar bracket options for 45mm, 50mm, 63mm, 73mm, and 76mm diameter applications, and proven RFI quality engineering delivering reliable purpose-built bull bar antenna mounting solution for 4WD touring, commercial vehicles, and off-road communication installations. Product Overview Black powder coated wrap around stainless steel bull bar bracket with 6mm cable slot for ease of antenna mounting. Specifically manufactured to mount antennas onto 50mm diameter bull bars, the BBWM-50 features black powder coated 3mm stainless steel construction, 6mm cable slot, dual installation bolts and security locking screw. The BBWM range cater for bars of 45, 50, 63 and 73mm diameters. Key Features Vehicle-Specific 50mm Bull Bar Diameter Compatibility - Precisely engineered for 50mm diameter bull bar tubes ensuring proper fitment on compact Australian bull bar configurations. Heavy-Duty 3mm Stainless Steel Construction - Robust 3mm stainless steel material provides exceptional mounting strength and structural rigidity for demanding off-road and highway antenna installations. Professional Black Powder-Coated Finish - Durable black coating enhances corrosion protection and provides discreet appearance complementing modern 4WD vehicle styling and dark-colored bull bars. Wrap-Around Design for Superior Security - Innovative bracket encircles bull bar tube providing superior mounting stability and load distribution compared to standard clamp-style brackets. Integrated 6mm Cable Slot with Dual Bolt Installation - Built-in cable slot simplifies antenna installation while dual installation bolts distribute mounting loads ensuring stable secure attachment to bull bar. Security Locking Screw Anti-Theft Protection - Integrated security locking screw prevents unauthorized antenna removal protecting valuable UHF CB communication equipment from theft. Technical Specifications Specification Details Model BBWM-50-B SKU BBWM-50-B Brand RFI Product Type Bull Bar Antenna Bracket (Wrap-Around Design) Material Stainless Steel Material Thickness 3mm (Heavy Duty) Finish Black (Powder-Coated) Design Wrap-around bull bar bracket with cable slot Bull Bar Diameter Compatibility 50mm Cable Slot 6mm Installation Bolts Dual installation bolts (2 included) Security Feature Security locking screw Vehicle Compatibility Universal (4WD vehicles, utes, trucks with 50mm bull bars) Antenna Compatibility Standard UHF CB antennas, Spring base antennas, Fixed mount antennas Component Type Bracket Drilling Required No drilling to bull bar (wrap-around clamp design) Corrosion Protection Black powder-coated finish over stainless steel BBWM Range Available in 45mm, 50mm, 63mm, 73mm, 76mm diameters Application Bull bar antenna mounting, 4WD communication installations, Off-road antenna mounting Frequently Asked Questions Q: What vehicles typically have 50mm diameter bull bars? A: 50mm diameter common on compact and light-duty bull bars for smaller 4WD vehicles, SUVs, and some utes. Represents lighter bull bar construction compared to 63mm and 76mm heavy-duty options. Common on aftermarket bull bars for compact SUVs and lighter vehicles. Measure bull bar tube diameter at proposed mounting location confirming 50mm before purchase—verify actual diameter rather than assuming based on vehicle size. Q: What is the difference between BBWM-50-B and BBWM-63-B? A: BBWM-50-B and BBWM-63-B identical in construction and features—sole difference is diameter compatibility. BBWM-50-B fits 50mm bull bars (compact vehicles), BBWM-63-B fits 63mm bull bars (mid-size vehicles). Both: 3mm stainless steel, black powder-coated finish, 6mm cable slot, dual bolts, security screw. Measure bull bar diameter accurately and select corresponding BBWM model ensuring proper fitment and secure mounting. Q: Will BBWM-50-B work on 45mm or 50mm+ diameter bull bars? A: BBWM-50-B specifically engineered for 50mm diameter—not recommended for significantly different sizes. For 45mm diameter use BBWM-45. Minor tolerance (±1mm) may work but compromises fitment and security. Using incorrect size risks inadequate clamping force, bracket slippage, or bull bar finish damage from over-tightening. RFI BBWM range offers brackets for 45mm, 50mm, 63mm, 73mm, and 76mm ensuring proper diameter match. Q: Is 3mm stainless steel overkill for 50mm bull bars? A: BBWM-50-B 3mm stainless steel provides heavy-duty construction suitable for all BBWM range sizes maintaining consistent quality across product line. Benefits for 50mm application: exceptional mounting strength despite smaller bull bar diameter, enhanced durability for off-road conditions, superior resistance to bracket flexing, long-term reliability. Heavy-duty construction ensures reliable antenna mounting regardless of bull bar size—50mm diameter benefits from same professional-grade materials as larger brackets. Q: Can BBWM-50-B mount antennas on horizontal and vertical bull bar tubes? A: Yes—BBWM-50-B wrap-around design suitable for both horizontal and vertical 50mm bull bar tubes. Horizontal mounting positions antenna vertically on top tube. Vertical mounting attaches to vertical bull bar uprights if preferred. Verify 6mm cable slot orientation allows proper cable routing regardless of tube orientation. Dual bolt installation maintains secure mounting on either orientation. Select location optimizing antenna position and cable routing convenience.Legendary Products & Support From Authorized Dealers When you choose Frankies BrandBeast, you're choosing quality and performance. But just as important as what you buy is where you buy it from. Here's why purchasing from an authorized dealer is always the right choice: ▸ Expert Knowledge & TrainingOnly authorized Frankies BrandBeast dealers are factory-trained to sell and install our products. They have the expertise to ensure your purchase is set up correctly and meets your expectations. ▸ Authorized Warranty ProtectionWe offer one of the best warranties in the industry, but only purchases made through authorized dealers are covered. Don’t be misled by unauthorized sellers who can’t provide genuine warranty support. ▸ Reliable Customer SupportIf you ever run into an issue, you’re backed by Frankies BrandBeast’s official manufacturer’s warranty. No need to deal with overseas returns—our local team takes care of everything quickly and efficiently. ▸ Protect Your InvestmentBuying from an authorized dealer ensures you’re getting genuine products, full warranty coverage, and expert support. Ask yourself—is saving a few bucks worth losing all that? Choose wisely. Buy from Frankies BrandBeast today!
$47.60
-

RFI RFI BBWM-63 Polished Stainless Steel Wrap Around Bull Bar Bracket
RFI BBWM-63 Polished Stainless Steel Wrap Around Bull Bar Bracket - Professional 63mm Diameter Bull Bar Antenna Mount with 6mm Cable Slot, Dual Bolt Installation, and Security Locking Screw Achieve secure professional bull bar antenna mounting with RFI BBWM-63 Polished Stainless Steel Wrap Around Bracket—featuring vehicle-specific 63mm diameter bull bar compatibility ensuring precise fitment on popular Australian mid-size bull bar tubing, heavy-duty 3mm stainless steel construction providing exceptional mounting strength and long-term durability for demanding off-road and highway conditions, professional polished stainless steel finish offering bright metallic appearance complementing chrome and polished bull bars, innovative wrap-around design encircling bull bar tube providing superior mounting security and load distribution compared to standard clamp brackets, integrated 6mm cable slot simplifying antenna installation and cable management eliminating separate routing requirements, dual installation bolts distributing mounting loads across wrap-around design ensuring stable secure attachment, security locking screw preventing unauthorized antenna removal or theft protecting valuable communication equipment, professional-grade stainless steel resisting rust and corrosion in Australian coastal and outback environments, universal UHF CB antenna compatibility accommodating spring bases and fixed-mount configurations, part of comprehensive BBWM range offering bull bar bracket options for 45mm, 50mm, 63mm, 73mm, and 76mm diameter applications, and proven RFI quality engineering delivering reliable purpose-built bull bar antenna mounting solution for 4WD touring, commercial vehicles, and off-road communication installations. Product Overview Polished wrap around stainless steel bull bar bracket with 6mm cable slot for ease of antenna mounting. Specifically manufactured to mount antennas onto 63mm diameter bull bars, the BBWM-63 features 3mm stainless steel construction, 6mm cable slot, dual installation bolts and security locking screw. The BBWM range cater for bars of 45, 50, 63 and 73mm diameters. Key Features Vehicle-Specific 63mm Bull Bar Diameter Compatibility - Precisely engineered for 63mm diameter bull bar tubes ensuring proper fitment on popular Australian mid-size 4WD bull bar configurations. Heavy-Duty 3mm Stainless Steel Construction - Robust 3mm stainless steel material provides exceptional mounting strength and structural rigidity for demanding off-road and highway antenna installations. Professional Polished Stainless Steel Finish - Bright metallic polished finish provides premium appearance complementing chrome and polished bull bars while maintaining excellent corrosion resistance. Wrap-Around Design for Superior Security - Innovative bracket encircles bull bar tube providing superior mounting stability and load distribution compared to standard clamp-style brackets. Integrated 6mm Cable Slot with Dual Bolt Installation - Built-in cable slot simplifies antenna installation while dual installation bolts distribute mounting loads ensuring stable secure attachment to bull bar. Security Locking Screw Anti-Theft Protection - Integrated security locking screw prevents unauthorized antenna removal protecting valuable UHF CB communication equipment from theft. Technical Specifications Specification Details Model BBWM-63 SKU BBWM-63 Brand RFI Product Type Bull Bar Antenna Bracket (Wrap-Around Design) Material Stainless Steel Material Thickness 3mm (Heavy Duty) Finish Polished Stainless Steel Design Wrap-around bull bar bracket with cable slot Bull Bar Diameter Compatibility 63mm Cable Slot 6mm Installation Bolts Dual installation bolts (2 included) Security Feature Security locking screw Vehicle Compatibility Universal (4WD vehicles, utes, trucks with 63mm bull bars) Antenna Compatibility Standard UHF CB antennas, Spring base antennas, Fixed mount antennas Component Type Bracket Drilling Required No drilling to bull bar (wrap-around clamp design) Corrosion Protection Polished stainless steel (natural corrosion resistance) BBWM Range Available in 45mm, 50mm, 63mm, 73mm, 76mm diameters Application Bull bar antenna mounting, 4WD communication installations, Off-road antenna mounting Frequently Asked Questions Q: What is the difference between BBWM-63 and BBWM-63-B? A: BBWM-63 and BBWM-63-B identical in construction and functionality—sole difference is finish. BBWM-63 features polished stainless steel finish providing bright metallic appearance ideal for chrome or polished bull bars. BBWM-63-B features black powder-coated finish complementing dark-colored or matte black bull bars. Both: 3mm stainless steel, 63mm diameter, 6mm cable slot, dual bolts, security locking screw. Choose BBWM-63 for traditional polished appearance matching chrome accessories. Choose BBWM-63-B for modern matte black aesthetic. Q: What vehicles commonly have 63mm bull bars? A: 63mm diameter common on mid-size 4WD vehicles including Toyota Hilux, Ford Ranger, Isuzu D-Max, Mitsubishi Triton, Holden Colorado, and Nissan Navara. Represents popular mid-range bull bar size suitable for most utes and mid-size SUVs. Measure bull bar tube diameter at proposed mounting location confirming 63mm before purchase—bull bar manufacturers use various tube sizes regardless of vehicle model. Q: Will polished stainless finish match my chrome bull bar? A: BBWM-63 polished stainless steel finish complements chrome, polished stainless, or aluminum bull bars providing coordinated appearance. Bright metallic finish suitable for traditional 4WD styling with chrome accessories and polished components. If bull bar features powder-coated black or matte finish, consider BBWM-63-B black version for better aesthetic match. Polished finish maintains natural stainless corrosion resistance without coating. Q: How does 3mm stainless steel compare to thinner bracket materials? A: BBWM-63 3mm stainless steel provides heavy-duty construction exceeding standard bracket materials. Benefits: exceptional mounting strength supporting antenna wind loads at highway speeds, enhanced durability for severe off-road conditions, superior resistance to bracket flexing or deformation, long-term reliability for commercial and recreational applications. Thinner materials (1.4-2mm) adequate for light-duty applications but 3mm construction provides professional-grade mounting security for demanding bull bar installations. Q: Can BBWM-63 be installed without removing bull bar from vehicle? A: Yes—BBWM-63 wrap-around design installs directly on mounted bull bar without removal. Position bracket on bull bar tube at desired location, thread antenna cable through 6mm slot if pre-routing, insert and tighten dual installation bolts progressively around tube, install security locking screw. No bull bar removal required simplifying installation. Ensure adequate working clearance around chosen mounting location for tool access and bracket positioning.Legendary Products & Support From Authorized Dealers When you choose Frankies BrandBeast, you're choosing quality and performance. But just as important as what you buy is where you buy it from. Here's why purchasing from an authorized dealer is always the right choice: ▸ Expert Knowledge & TrainingOnly authorized Frankies BrandBeast dealers are factory-trained to sell and install our products. They have the expertise to ensure your purchase is set up correctly and meets your expectations. ▸ Authorized Warranty ProtectionWe offer one of the best warranties in the industry, but only purchases made through authorized dealers are covered. Don’t be misled by unauthorized sellers who can’t provide genuine warranty support. ▸ Reliable Customer SupportIf you ever run into an issue, you’re backed by Frankies BrandBeast’s official manufacturer’s warranty. No need to deal with overseas returns—our local team takes care of everything quickly and efficiently. ▸ Protect Your InvestmentBuying from an authorized dealer ensures you’re getting genuine products, full warranty coverage, and expert support. Ask yourself—is saving a few bucks worth losing all that? Choose wisely. Buy from Frankies BrandBeast today!
$59.40
-

RFI RFI BBWM-63-B Black Stainless Steel Wrap Around Bull Bar Bracket
RFI BBWM-63-B Black Stainless Steel Wrap Around Bull Bar Bracket - Professional 63mm Diameter Bull Bar Antenna Mount with 6mm Cable Slot, Dual Bolt Installation, and Security Locking Screw Achieve secure professional bull bar antenna mounting with RFI BBWM-63-B Black Stainless Steel Wrap Around Bracket—featuring vehicle-specific 63mm diameter bull bar compatibility ensuring precise fitment on popular Australian mid-size bull bar tubing, heavy-duty 3mm stainless steel construction providing exceptional mounting strength and long-term durability for demanding off-road and highway conditions, professional black powder-coated finish enhancing corrosion protection and complementing modern 4WD vehicle aesthetics, innovative wrap-around design encircling bull bar tube providing superior mounting security and load distribution compared to standard clamp brackets, integrated 6mm cable slot simplifying antenna installation and cable management eliminating separate routing requirements, dual installation bolts distributing mounting loads across wrap-around design ensuring stable secure attachment, security locking screw preventing unauthorized antenna removal or theft protecting valuable communication equipment, professional-grade stainless steel resisting rust and corrosion in Australian coastal and outback environments, universal UHF CB antenna compatibility accommodating spring bases and fixed-mount configurations, part of comprehensive BBWM range offering bull bar bracket options for 45mm, 50mm, 63mm, 73mm, and 76mm diameter applications, and proven RFI quality engineering delivering reliable purpose-built bull bar antenna mounting solution for 4WD touring, commercial vehicles, and off-road communication installations. Product Overview Black powder coated wrap around stainless steel bull bar bracket with 6mm cable slot for ease of antenna mounting. Specifically manufactured to mount antennas onto 63mm diameter bull bars, the BBWM-63 features black powder coated 3mm stainless steel construction, 6mm cable slot, dual installation bolts and security locking screw. The BBWM range cater for bars of 45, 50, 63 and 73mm diameters. Key Features Vehicle-Specific 63mm Bull Bar Diameter Compatibility - Precisely engineered for 63mm diameter bull bar tubes ensuring proper fitment on popular Australian mid-size 4WD bull bar configurations. Heavy-Duty 3mm Stainless Steel Construction - Robust 3mm stainless steel material provides exceptional mounting strength and structural rigidity for demanding off-road and highway antenna installations. Professional Black Powder-Coated Finish - Durable black coating enhances corrosion protection and provides discreet appearance complementing modern 4WD vehicle styling and dark-colored bull bars. Wrap-Around Design for Superior Security - Innovative bracket encircles bull bar tube providing superior mounting stability and load distribution compared to standard clamp-style brackets. Integrated 6mm Cable Slot with Dual Bolt Installation - Built-in cable slot simplifies antenna installation while dual installation bolts distribute mounting loads ensuring stable secure attachment to bull bar. Security Locking Screw Anti-Theft Protection - Integrated security locking screw prevents unauthorized antenna removal protecting valuable UHF CB communication equipment from theft. Technical Specifications Specification Details Model BBWM-63-B SKU BBWM-63-B Brand RFI Product Type Bull Bar Antenna Bracket (Wrap-Around Design) Material Stainless Steel Material Thickness 3mm (Heavy Duty) Finish Black (Powder-Coated) Design Wrap-around bull bar bracket with cable slot Bull Bar Diameter Compatibility 63mm Cable Slot 6mm Installation Bolts Dual installation bolts (2 included) Security Feature Security locking screw Vehicle Compatibility Universal (4WD vehicles, utes, trucks with 63mm bull bars) Antenna Compatibility Standard UHF CB antennas, Spring base antennas, Fixed mount antennas Component Type Bracket Drilling Required No drilling to bull bar (wrap-around clamp design) Corrosion Protection Black powder-coated finish over stainless steel BBWM Range Available in 45mm, 50mm, 63mm, 73mm, 76mm diameters Application Bull bar antenna mounting, 4WD communication installations, Off-road antenna mounting Frequently Asked Questions Q: What vehicles typically have 63mm diameter bull bars? A: 63mm diameter common on mid-size 4WD vehicles and popular utes including Hilux, Ranger, D-Max, Triton, Colorado, and Navara. Represents popular mid-range bull bar size between lighter 50mm bars and heavy-duty 76mm bars. Measure bull bar tube diameter at proposed mounting location confirming 63mm before purchase. Bull bar manufacturers use various tube sizes—verify actual diameter rather than assuming based on vehicle model. Q: What is the difference between BBWM-63-B and BBWM-76-B? A: BBWM-63-B and BBWM-76-B identical in construction and features—sole difference is diameter compatibility. BBWM-63-B fits 63mm bull bars (mid-size vehicles), BBWM-76-B fits 76mm bull bars (larger vehicles). Both: 3mm stainless steel, black powder-coated finish, 6mm cable slot, dual bolts, security screw. Measure bull bar diameter and select corresponding BBWM model. Using incorrect size risks inadequate clamping, bracket slippage, or bull bar finish damage. Q: Can BBWM-63-B fit bull bars slightly different from 63mm? A: BBWM-63-B specifically engineered for 63mm diameter—not recommended for significantly different sizes. Minor tolerance (±1-2mm) may work but compromises fitment and security. For other diameters: BBWM-76 (76mm), BBWM-73 (73mm), BBWM-50 (50mm), BBWM-45 (45mm). Measure bull bar accurately using calipers or measuring tape. Select correct BBWM bracket ensuring proper wrap-around engagement and secure mounting without over-tightening. Q: How do I install BBWM-63-B on my bull bar? A: Position wrap-around bracket on 63mm bull bar tube at desired antenna mounting location. Thread cable through 6mm slot before tightening if pre-routing cable. Insert dual installation bolts through bracket holes and tighten progressively ensuring even clamping around tube. Install security locking screw after positioning bracket correctly. Verify bracket secure without excessive tightening potentially damaging bull bar finish. Mount antenna through bracket hole and connect cable. Q: Will black finish match my bull bar color? A: BBWM-63-B black powder-coated finish complements matte black, powder-coated black, or dark-colored bull bars providing coordinated appearance. Ideal for modern 4WD styling with black accessories. If bull bar features polished stainless, chrome, or aluminum finish, consider BBWM-63 polished stainless version for better aesthetic match. Black finish provides enhanced corrosion protection while maintaining discreet low-profile appearance on dark bull bars.Legendary Products & Support From Authorized Dealers When you choose Frankies BrandBeast, you're choosing quality and performance. But just as important as what you buy is where you buy it from. Here's why purchasing from an authorized dealer is always the right choice: ▸ Expert Knowledge & TrainingOnly authorized Frankies BrandBeast dealers are factory-trained to sell and install our products. They have the expertise to ensure your purchase is set up correctly and meets your expectations. ▸ Authorized Warranty ProtectionWe offer one of the best warranties in the industry, but only purchases made through authorized dealers are covered. Don’t be misled by unauthorized sellers who can’t provide genuine warranty support. ▸ Reliable Customer SupportIf you ever run into an issue, you’re backed by Frankies BrandBeast’s official manufacturer’s warranty. No need to deal with overseas returns—our local team takes care of everything quickly and efficiently. ▸ Protect Your InvestmentBuying from an authorized dealer ensures you’re getting genuine products, full warranty coverage, and expert support. Ask yourself—is saving a few bucks worth losing all that? Choose wisely. Buy from Frankies BrandBeast today!
$59.40
-

RFI RFI BBWM-76 Polished Stainless Steel Wrap Around Bull Bar Bracket
RFI BBWM-76 Polished Stainless Steel Wrap Around Bull Bar Bracket - Professional 76mm Diameter Bull Bar Antenna Mount with 6mm Cable Slot, Dual Bolt Installation, and Security Locking Screw Achieve secure professional bull bar antenna mounting with RFI BBWM-76 Polished Stainless Steel Wrap Around Bracket—featuring vehicle-specific 76mm diameter bull bar compatibility ensuring precise fitment on standard Australian bull bar tubing, heavy-duty 3mm stainless steel construction providing exceptional mounting strength and long-term durability for demanding off-road and highway conditions, professional polished stainless steel finish offering bright metallic appearance complementing chrome and polished bull bars, innovative wrap-around design encircling bull bar tube providing superior mounting security and load distribution compared to standard clamp brackets, integrated 6mm cable slot simplifying antenna installation and cable management eliminating separate routing requirements, dual installation bolts distributing mounting loads across wrap-around design ensuring stable secure attachment, security locking screw preventing unauthorized antenna removal or theft protecting valuable communication equipment, professional-grade stainless steel resisting rust and corrosion in Australian coastal and outback environments, universal UHF CB antenna compatibility accommodating spring bases and fixed-mount configurations, part of comprehensive BBWM range offering bull bar bracket options for 45mm, 50mm, 63mm, 73mm, and 76mm diameter applications, and proven RFI quality engineering delivering reliable purpose-built bull bar antenna mounting solution for 4WD touring, commercial vehicles, and off-road communication installations. Product Overview Polished wrap around stainless steel bull bar bracket with 6mm cable slot for ease of antenna mounting. Specifically manufactured to mount antennas onto 76mm diameter bull bars, the BBWM-76 features 3mm stainless steel construction, 6mm cable slot, dual installation bolts and security locking screw. The BBWM range cater for bars of 45, 50, 63 and 73mm diameters. Key Features Vehicle-Specific 76mm Bull Bar Diameter Compatibility - Precisely engineered for 76mm diameter bull bar tubes ensuring proper fitment on standard Australian 4WD bull bar configurations. Heavy-Duty 3mm Stainless Steel Construction - Robust 3mm stainless steel material provides exceptional mounting strength and structural rigidity for demanding off-road and highway antenna installations. Professional Polished Stainless Steel Finish - Bright metallic polished finish provides premium appearance complementing chrome and polished bull bars while maintaining excellent corrosion resistance. Wrap-Around Design for Superior Security - Innovative bracket encircles bull bar tube providing superior mounting stability and load distribution compared to standard clamp-style brackets. Integrated 6mm Cable Slot with Dual Bolt Installation - Built-in cable slot simplifies antenna installation while dual installation bolts distribute mounting loads ensuring stable secure attachment to bull bar. Security Locking Screw Anti-Theft Protection - Integrated security locking screw prevents unauthorized antenna removal protecting valuable UHF CB communication equipment from theft. Technical Specifications Specification Details Model BBWM-76 SKU BBWM-76 Brand RFI Product Type Bull Bar Antenna Bracket (Wrap-Around Design) Material Stainless Steel Material Thickness 3mm (Heavy Duty) Finish Polished Stainless Steel Design Wrap-around bull bar bracket with cable slot Bull Bar Diameter Compatibility 76mm Cable Slot 6mm Installation Bolts Dual installation bolts (2 included) Security Feature Security locking screw Vehicle Compatibility Universal (4WD vehicles, utes, trucks with 76mm bull bars) Antenna Compatibility Standard UHF CB antennas, Spring base antennas, Fixed mount antennas Component Type Bracket Drilling Required No drilling to bull bar (wrap-around clamp design) Corrosion Protection Polished stainless steel (natural corrosion resistance) BBWM Range Available in 45mm, 50mm, 63mm, 73mm, 76mm diameters Application Bull bar antenna mounting, 4WD communication installations, Off-road antenna mounting Frequently Asked Questions Q: What is the difference between BBWM-76 and BBWM-76-B? A: BBWM-76 and BBWM-76-B identical in construction and functionality—sole difference is finish. BBWM-76 features polished stainless steel finish providing bright metallic appearance ideal for chrome or polished bull bars. BBWM-76-B features black powder-coated finish complementing dark-colored or matte black bull bars. Both: 3mm stainless steel, 76mm diameter, 6mm cable slot, dual bolts, security locking screw. Choose BBWM-76 for traditional polished appearance matching chrome accessories. Choose BBWM-76-B for modern matte black aesthetic. Q: Will polished stainless steel finish match my bull bar? A: BBWM-76 polished stainless steel finish complements chrome, polished stainless, or aluminum bull bars providing coordinated appearance. Bright metallic finish suitable for traditional 4WD styling with chrome accessories. If bull bar features powder-coated black, matte black, or dark finish, consider BBWM-76-B black version for better aesthetic match. Polished finish maintains natural stainless corrosion resistance without coating requiring maintenance. Q: How do I measure my bull bar to confirm 76mm diameter? A: Use calipers or measuring tape measuring outside diameter of bull bar tube at proposed antenna mounting location—76mm represents external tube diameter. Common Australian bull bar diameters: 45mm, 50mm, 63mm, 73mm, 76mm (outside measurements). 76mm typical for heavy-duty bull bars on larger 4WD vehicles (Landcruiser, Patrol, RAM). Some bull bars feature different tube diameters at various positions—verify measurement at actual mounting location. RFI BBWM range covers all common diameters. Q: How does wrap-around design compare to U-bolt or clamp brackets? A: Wrap-around design encircles bull bar tube providing superior mounting compared to U-bolts or single-point clamps. Benefits: distributes antenna loads across greater surface area preventing stress concentration, resists rotation and twisting under wind loads, integrated cable slot within wrap-around structure, dual bolt installation plus security screw. U-bolts and clamps attach at limited points potentially allowing movement. Wrap-around design particularly beneficial for highway speeds and severe off-road conditions requiring maximum antenna stability. Q: Can BBWM-76 mount on horizontal and vertical bull bar tubes? A: Yes—BBWM-76 wrap-around design suitable for both horizontal and vertical 76mm bull bar tubes. Horizontal mounting (most common): positions antenna vertically on top horizontal tube providing elevated position. Vertical mounting: attaches to vertical bull bar uprights if preferred. Verify 6mm cable slot orientation allows proper cable routing regardless of tube orientation. Dual bolt installation maintains secure attachment on either orientation. Select mounting location optimizing antenna position, vehicle clearance, and cable routing convenience.Legendary Products & Support From Authorized Dealers When you choose Frankies BrandBeast, you're choosing quality and performance. But just as important as what you buy is where you buy it from. Here's why purchasing from an authorized dealer is always the right choice: ▸ Expert Knowledge & TrainingOnly authorized Frankies BrandBeast dealers are factory-trained to sell and install our products. They have the expertise to ensure your purchase is set up correctly and meets your expectations. ▸ Authorized Warranty ProtectionWe offer one of the best warranties in the industry, but only purchases made through authorized dealers are covered. Don’t be misled by unauthorized sellers who can’t provide genuine warranty support. ▸ Reliable Customer SupportIf you ever run into an issue, you’re backed by Frankies BrandBeast’s official manufacturer’s warranty. No need to deal with overseas returns—our local team takes care of everything quickly and efficiently. ▸ Protect Your InvestmentBuying from an authorized dealer ensures you’re getting genuine products, full warranty coverage, and expert support. Ask yourself—is saving a few bucks worth losing all that? Choose wisely. Buy from Frankies BrandBeast today!
$63.00
-

RFI RFI BBWM-76-B Black Stainless Steel Wrap Around Bull Bar Bracket
RFI BBWM-76-B Black Stainless Steel Wrap Around Bull Bar Bracket - Professional 76mm Diameter Bull Bar Antenna Mount with 6mm Cable Slot, Dual Bolt Installation, and Security Locking Screw Achieve secure professional bull bar antenna mounting with RFI BBWM-76-B Black Stainless Steel Wrap Around Bracket—featuring vehicle-specific 76mm diameter bull bar compatibility ensuring precise fitment on standard Australian bull bar tubing, heavy-duty 3mm stainless steel construction providing exceptional mounting strength and long-term durability for demanding off-road and highway conditions, professional black powder-coated finish enhancing corrosion protection and complementing modern 4WD vehicle aesthetics, innovative wrap-around design encircling bull bar tube providing superior mounting security and load distribution compared to standard clamp brackets, integrated 6mm cable slot simplifying antenna installation and cable management eliminating separate routing requirements, dual installation bolts distributing mounting loads across wrap-around design ensuring stable secure attachment, security locking screw preventing unauthorized antenna removal or theft protecting valuable communication equipment, professional-grade stainless steel resisting rust and corrosion in Australian coastal and outback environments, universal UHF CB antenna compatibility accommodating spring bases and fixed-mount configurations, part of comprehensive BBWM range offering bull bar bracket options for 45mm, 50mm, 63mm, 73mm, and 76mm diameter applications, and proven RFI quality engineering delivering reliable purpose-built bull bar antenna mounting solution for 4WD touring, commercial vehicles, and off-road communication installations. Product Overview Black powder coated wrap around stainless steel bull bar bracket with 6mm cable slot for ease of antenna mounting. Specifically manufactured to mount antennas onto 76mm diameter bull bars, the BBWM-76-B features black powder coated 3mm stainless steel construction, 6mm cable slot, dual installation bolts and security locking screw. The BBWM range cater for bars of 45, 50, 63 and 73mm diameters. Key Features Vehicle-Specific 76mm Bull Bar Diameter Compatibility - Precisely engineered for 76mm diameter bull bar tubes ensuring proper fitment on standard Australian 4WD bull bar configurations. Heavy-Duty 3mm Stainless Steel Construction - Robust 3mm stainless steel material provides exceptional mounting strength and structural rigidity for demanding off-road and highway antenna installations. Professional Black Powder-Coated Finish - Durable black coating enhances corrosion protection and provides discreet appearance complementing modern 4WD vehicle styling and dark-colored bull bars. Wrap-Around Design for Superior Security - Innovative bracket encircles bull bar tube providing superior mounting stability and load distribution compared to standard clamp-style brackets. Integrated 6mm Cable Slot with Dual Bolt Installation - Built-in cable slot simplifies antenna installation while dual installation bolts distribute mounting loads ensuring stable secure attachment to bull bar. Security Locking Screw Anti-Theft Protection - Integrated security locking screw prevents unauthorized antenna removal protecting valuable UHF CB communication equipment from theft. Technical Specifications Specification Details Model BBWM-76-B SKU BBWM-76-B Brand RFI Product Type Bull Bar Antenna Bracket (Wrap-Around Design) Material Stainless Steel Material Thickness 3mm (Heavy Duty) Finish Black (Powder-Coated) Design Wrap-around bull bar bracket with cable slot Bull Bar Diameter Compatibility 76mm Cable Slot 6mm Installation Bolts Dual installation bolts (2 included) Security Feature Security locking screw Vehicle Compatibility Universal (4WD vehicles, utes, trucks with 76mm bull bars) Antenna Compatibility Standard UHF CB antennas, Spring base antennas, Fixed mount antennas Component Type Bracket Drilling Required No drilling to bull bar (wrap-around clamp design) Corrosion Protection Black powder-coated finish over stainless steel BBWM Range Available in 45mm, 50mm, 63mm, 73mm, 76mm diameters Application Bull bar antenna mounting, 4WD communication installations, Off-road antenna mounting Frequently Asked Questions Q: How do I determine if my bull bar is 76mm diameter? A: Measure bull bar tube diameter using calipers or measuring tape—76mm represents outside diameter of bull bar tube. Common Australian bull bar sizes: 45mm, 50mm, 63mm, 73mm, 76mm. 76mm diameter typical for heavy-duty 4WD bull bars on larger vehicles (Landcruiser, Patrol, RAM trucks). Measure at proposed antenna mounting location as some bull bars feature different tube diameters at various positions. If uncertain, consult bull bar manufacturer specifications or measure existing bull bar. RFI BBWM range offers brackets for all common diameters ensuring proper fitment. Q: What is the advantage of wrap-around design versus clamp-style brackets? A: Wrap-around design encircles bull bar tube providing superior mounting security and stability. Benefits: distributes antenna loading across greater bull bar surface area, resists rotation and movement better than single-point clamps, enhanced security with dual bolts plus locking screw, integrated cable slot within wrap-around structure. Clamp-style brackets attach at single point potentially allowing rotation under antenna wind loads. Wrap-around design particularly beneficial for highway speeds and off-road conditions where antenna stability critical. Q: How does the security locking screw prevent antenna theft? A: Security locking screw requires special key or tool preventing removal with standard tools—deters opportunistic antenna theft. Standard installation bolts secure bracket to bull bar, security screw prevents antenna removal from mounted bracket. Benefits: protects valuable UHF CB antennas from theft, particularly important for commercial vehicles and urban parking, simple security measure without complex locking mechanisms. Security screw complements dual bolt installation providing theft deterrent while maintaining convenient authorized antenna removal when needed. Q: Will BBWM-76-B fit bull bars slightly smaller or larger than 76mm? A: BBWM-76-B specifically engineered for 76mm diameter—not recommended for significantly different sizes. Minor tolerance (±1-2mm) may work but compromises optimal fitment and mounting security. For other diameters: BBWM-73 (73mm), BBWM-63 (63mm), BBWM-50 (50mm), BBWM-45 (45mm). Measure bull bar accurately and select corresponding BBWM bracket ensuring proper wrap-around engagement and secure mounting. Using incorrect size risks inadequate clamping force, potential bracket slippage, or damage to bull bar finish from over-tightening attempting to compensate. Q: Can BBWM-76-B mount antennas on horizontal or vertical bull bar tubes? A: BBWM-76-B wrap-around design suitable for both horizontal and vertical 76mm bull bar tubes. Horizontal tube mounting (most common): positions antenna vertically on top horizontal bull bar tube providing elevated mounting position. Vertical tube mounting: attaches to vertical bull bar uprights if preferred positioning or horizontal tubes unavailable. Verify cable slot orientation allows proper cable routing regardless of tube orientation. Dual bolt installation and wrap-around design maintain secure mounting on either horizontal or vertical tubes. Choose mounting location optimizing antenna position and cable routing to vehicle interior.Legendary Products & Support From Authorized Dealers When you choose Frankies BrandBeast, you're choosing quality and performance. But just as important as what you buy is where you buy it from. Here's why purchasing from an authorized dealer is always the right choice: ▸ Expert Knowledge & TrainingOnly authorized Frankies BrandBeast dealers are factory-trained to sell and install our products. They have the expertise to ensure your purchase is set up correctly and meets your expectations. ▸ Authorized Warranty ProtectionWe offer one of the best warranties in the industry, but only purchases made through authorized dealers are covered. Don’t be misled by unauthorized sellers who can’t provide genuine warranty support. ▸ Reliable Customer SupportIf you ever run into an issue, you’re backed by Frankies BrandBeast’s official manufacturer’s warranty. No need to deal with overseas returns—our local team takes care of everything quickly and efficiently. ▸ Protect Your InvestmentBuying from an authorized dealer ensures you’re getting genuine products, full warranty coverage, and expert support. Ask yourself—is saving a few bucks worth losing all that? Choose wisely. Buy from Frankies BrandBeast today!
$63.00
-

RFI RFI MM2 Galvanised Mirror Mount Bracket
RFI MM2 Galvanised Mirror Mount Bracket - Heavy-Duty Universal Antenna Mounting Bracket for Truck Mirrors, Roof Racks, and Bull Bars with Corrosion-Resistant Galvanised Finish Achieve versatile professional antenna mounting with RFI MM2 Galvanised Mirror Mount Bracket—featuring heavy-duty galvanised steel construction providing robust corrosion-resistant mounting platform for UHF CB antennas across diverse vehicle mounting locations, professional galvanised finish offering excellent rust protection and durability in harsh Australian environments, universal mirror mount capability allowing secure antenna installation on truck-style side mirrors without permanent vehicle modifications, versatile roof rack compatibility providing elevated antenna mounting for improved UHF performance and 360-degree coverage, bull bar mounting suitability enabling front-mounted antenna installations on 4WD vehicles with aftermarket protection equipment, heavy-duty construction supporting any mobile antenna configuration including spring bases and fixed-mount antennas, adjustable mounting design accommodating different mounting scenarios and hardware requirements, compact efficient design maintaining minimal visual impact while providing secure antenna support, universal compatibility suitable for trucks, utes, 4WD vehicles, and commercial vehicles requiring flexible antenna mounting solutions, and proven RFI quality engineering delivering reliable cost-effective multi-purpose antenna mounting solution for diverse vehicle communication installations. Product Overview Heavy-duty mirror mount allows any mobile antenna to be mounted on a truck style mirror, roof rack, or bull bar. Heavy-duty mirror mount allows any mobile antenna to be mounted on a truck style mirror, roof rack, or bull bar. Key Features Heavy-Duty Galvanised Steel Construction - Robust galvanised steel material provides superior mounting strength and excellent corrosion protection for demanding antenna installations across multiple mounting locations. Versatile Multi-Position Mounting Capability - Universal design accommodates truck-style side mirrors, roof racks, and bull bars providing flexible antenna mounting solutions for diverse vehicle configurations. Professional Galvanised Corrosion Protection - Hot-dip galvanised finish provides excellent rust resistance and durability in harsh Australian coastal and outback environments. Universal Mirror Mount Compatibility - Suitable for truck-style and commercial vehicle side mirrors providing convenient antenna mounting without permanent vehicle modifications. Roof Rack and Bull Bar Mounting - Compatible with aftermarket roof racks and bull bars expanding antenna mounting options for 4WD vehicles and adventure touring setups. Any Mobile Antenna Compatibility - Heavy-duty construction supports all mobile antenna types including spring bases, fixed mounts, and standard UHF CB antennas. Technical Specifications Specification Details Model MM2 SKU MM2 Brand RFI Product Type Mirror Mount Antenna Bracket (Galvanised Universal Design) Material Steel Finish Galvanised Design Mirror mount bracket Mounting Locations Truck-style mirrors, Roof racks, Bull bars Mounting Type Universal adjustable configuration Vehicle Compatibility Universal (trucks, utes, 4WD vehicles, commercial vehicles) Antenna Compatibility Any mobile antenna (UHF CB antennas, Spring bases, Fixed mounts) Component Type Bracket Drilling Required Depends on mounting location and method Construction Heavy Duty Corrosion Protection Hot-dip galvanised coating Application Mirror mounting, Roof rack mounting, Bull bar mounting, Multi-position antenna installation Frequently Asked Questions Q: What is the difference between MM2 and MM2-SS? A: MM2 and MM2-SS functionally identical mirror mount brackets—sole difference is finish. MM2 features galvanised steel finish providing excellent corrosion protection at economical price point. MM2-SS uses stainless steel construction offering premium corrosion resistance and bright metallic appearance. Choose MM2 for cost-effective durability with proven galvanised protection. Choose MM2-SS for premium stainless finish or when matching existing stainless components. Both deliver reliable mounting performance across truck mirrors, roof racks, and bull bars. Q: How does galvanised finish compare to stainless steel for antenna brackets? A: Galvanised finish provides excellent corrosion protection through zinc coating—suitable for most Australian conditions including coastal and outback environments. Benefits: cost-effective compared to stainless steel, proven rust resistance, durable protective coating. Stainless steel offers premium corrosion resistance and bright metallic appearance without coating. Both finishes adequate for antenna mounting—galvanised represents economical choice while stainless provides premium option. Choose based on budget and aesthetic preferences. Q: What truck-style mirrors are compatible with MM2? A: MM2 designed for truck-style and commercial vehicle side mirrors with robust mounting structure—particularly suitable for large truck mirrors, heavy-duty ute mirrors with extended arms, 4WD vehicle mirrors with substantial housings, aftermarket towing mirrors. Verify mirror construction adequate supporting antenna weight and wind loading during highway travel. Compact passenger vehicle mirrors typically lack structural support for secure antenna mounting. Test-fit bracket on mirror assembly before final installation confirming proper engagement. Q: Can MM2 mount antennas on roof racks and bull bars? A: Yes—MM2 versatile universal design accommodates truck mirrors, roof racks, and bull bars. Roof rack mounting: bracket clamps onto roof rack rails or crossbars providing elevated antenna position improving UHF range and coverage. Bull bar mounting: attaches to bull bar tubes providing front-mounted antenna installation on 4WD vehicles. Universal design adjusts to various mounting surface configurations. Verify appropriate mounting hardware (U-bolts, clamps, bolts) for specific roof rack or bull bar tube diameter. Q: What hardware is needed to install MM2? A: MM2 mounting hardware varies by installation location—universal bracket design requires appropriate fasteners for specific mounting surface. Truck mirror mounting: bolts/nuts matching mirror arm diameter or housing mounting points. Roof rack mounting: U-bolts or clamps sized for rack tube diameter (typically 25-50mm). Bull bar mounting: U-bolts, hose clamps, or bolts matching bull bar tube diameter. Consult local automotive fastener supplier for hardware appropriate to your specific mounting location and surface dimensions.Legendary Products & Support From Authorized Dealers When you choose Frankies BrandBeast, you're choosing quality and performance. But just as important as what you buy is where you buy it from. Here's why purchasing from an authorized dealer is always the right choice: ▸ Expert Knowledge & TrainingOnly authorized Frankies BrandBeast dealers are factory-trained to sell and install our products. They have the expertise to ensure your purchase is set up correctly and meets your expectations. ▸ Authorized Warranty ProtectionWe offer one of the best warranties in the industry, but only purchases made through authorized dealers are covered. Don’t be misled by unauthorized sellers who can’t provide genuine warranty support. ▸ Reliable Customer SupportIf you ever run into an issue, you’re backed by Frankies BrandBeast’s official manufacturer’s warranty. No need to deal with overseas returns—our local team takes care of everything quickly and efficiently. ▸ Protect Your InvestmentBuying from an authorized dealer ensures you’re getting genuine products, full warranty coverage, and expert support. Ask yourself—is saving a few bucks worth losing all that? Choose wisely. Buy from Frankies BrandBeast today!
$11.50
-

RFI RFI MM2-SS Stainless Steel Slotted Mirror Mount Bracket
RFI MM2-SS Stainless Steel Slotted Mirror Mount Bracket - Heavy-Duty Universal Antenna Mounting Bracket for Truck Mirrors, Roof Racks, and Bull Bars with Adjustable Slotted Design Achieve versatile professional antenna mounting with RFI MM2-SS Stainless Steel Slotted Mirror Mount Bracket—featuring heavy-duty stainless steel construction providing robust corrosion-resistant mounting platform for UHF CB antennas across diverse vehicle mounting locations, innovative slotted design enabling adjustable antenna positioning and accommodating various mounting surface configurations, universal mirror mount capability allowing secure antenna installation on truck side mirrors without permanent vehicle modifications, versatile roof rack compatibility providing elevated antenna mounting for improved UHF performance and 360-degree coverage, bull bar mounting suitability enabling front-mounted antenna installations on 4WD vehicles with aftermarket protection equipment, professional-grade stainless steel resisting rust and corrosion in Australian coastal and outback environments, adjustable slotted configuration accommodating different mounting scenarios and hardware requirements, compact efficient design maintaining minimal visual impact while providing secure antenna support, universal compatibility suitable for trucks, utes, 4WD vehicles, and commercial vehicles requiring flexible antenna mounting solutions, and proven RFI quality engineering delivering reliable multi-purpose antenna mounting solution for diverse vehicle communication installations. Product Overview Heavy duty mirror mount allows antennas to be mounted on truck mirrors, roof racks or bull bars. Heavy duty mirror mount allows antennas to be mounted on truck mirrors, roof racks or bull bars. Key Features Heavy-Duty Stainless Steel Construction - Robust stainless steel material provides superior mounting strength and corrosion resistance for demanding antenna installations across multiple mounting locations. Versatile Multi-Position Mounting Capability - Universal design accommodates truck side mirrors, roof racks, and bull bars providing flexible antenna mounting solutions for diverse vehicle configurations. Adjustable Slotted Design - Slotted configuration enables adjustable antenna positioning and accommodates various mounting surface dimensions and hardware requirements. Universal Mirror Mount Compatibility - Suitable for truck and commercial vehicle side mirrors providing convenient antenna mounting without permanent vehicle modifications. Roof Rack and Bull Bar Mounting - Compatible with aftermarket roof racks and bull bars expanding antenna mounting options for 4WD vehicles and adventure touring setups. Professional Corrosion-Resistant Finish - Natural stainless steel construction resists rust and environmental degradation maintaining long-term mounting reliability. Technical Specifications Specification Details Model MM2-SS SKU MM2-SS Brand RFI Product Type Mirror Mount Antenna Bracket (Slotted Universal Design) Material Stainless Steel Finish Stainless Steel (natural) Design Slotted mirror mount bracket Mounting Locations Truck mirrors, Roof racks, Bull bars Mounting Type Adjustable slotted configuration Vehicle Compatibility Universal (trucks, utes, 4WD vehicles, commercial vehicles) Antenna Compatibility Standard UHF CB antennas Component Type Bracket Drilling Required Depends on mounting location and method Construction Heavy Duty Application Mirror mounting, Roof rack mounting, Bull bar mounting, Multi-position antenna installation Frequently Asked Questions Q: What mirrors are compatible with MM2-SS mirror mount bracket? A: MM2-SS designed for truck and commercial vehicle side mirrors with adequate mounting surface—particularly suitable for large truck mirrors with robust mounting arms or housings. Compatible with: commercial truck side mirrors, heavy-duty ute mirrors, 4WD vehicle mirrors with extended arms, aftermarket towing mirrors with substantial mounting structure. Verify mirror construction adequate supporting antenna weight and wind loading. Compact passenger vehicle mirrors may lack structural support for secure antenna mounting. Q: How does mirror mounting compare to fender or roof mounting? A: Mirror mounting provides unique advantages: elevated antenna position improving UHF range compared to fender mounting, more accessible than roof mounting for installation and maintenance, no permanent vehicle body modifications required, convenient driver-side visibility confirming antenna security. Considerations: mirror structure must support antenna weight and wind loads, potential mirror vibration affecting antenna stability, aesthetic impact of antenna on mirror assembly. Choose mirror mounting when elevated position desired without roof installation complexity. Q: Can MM2-SS be used on roof racks and bull bars? A: Yes—MM2-SS versatile design accommodates roof racks and bull bars in addition to mirror mounting. Roof rack mounting: clamps onto roof rack rails or crossbars providing elevated antenna position, benefits UHF performance with improved ground plane and 360-degree coverage. Bull bar mounting: attaches to bull bar tubes or mounting surfaces providing front-mounted antenna installation, suitable for 4WD vehicles with aftermarket protection equipment. Slotted design adjusts to various tube diameters and mounting surface configurations. Q: What does the slotted design allow? A: Slotted configuration provides adjustable mounting flexibility accommodating various installation scenarios. Benefits: adjustable antenna positioning optimizing orientation, accommodates different mounting surface dimensions, enables hardware positioning adjustments, provides installation tolerance for non-standard mounting locations. Slots allow bracket adjustment during installation ensuring proper antenna alignment and secure attachment across diverse mounting surfaces including mirrors, roof racks, and bull bars with varying dimensions. Q: What hardware is required for MM2-SS installation? A: MM2-SS mounting hardware requirements vary depending on installation location—bracket designed for universal application requiring appropriate fasteners for specific mounting surface. Mirror mounting: typically requires bolts/nuts matching mirror arm diameter or housing mounting points. Roof rack mounting: U-bolts or clamps appropriate for rack tube diameter. Bull bar mounting: U-bolts, hose clamps, or bolts matching bull bar tube diameter. Verify mounting hardware compatibility with specific application—consult local automotive fastener supplier for appropriate hardware matching your mounting location.Legendary Products & Support From Authorized Dealers When you choose Frankies BrandBeast, you're choosing quality and performance. But just as important as what you buy is where you buy it from. Here's why purchasing from an authorized dealer is always the right choice: ▸ Expert Knowledge & TrainingOnly authorized Frankies BrandBeast dealers are factory-trained to sell and install our products. They have the expertise to ensure your purchase is set up correctly and meets your expectations. ▸ Authorized Warranty ProtectionWe offer one of the best warranties in the industry, but only purchases made through authorized dealers are covered. Don’t be misled by unauthorized sellers who can’t provide genuine warranty support. ▸ Reliable Customer SupportIf you ever run into an issue, you’re backed by Frankies BrandBeast’s official manufacturer’s warranty. No need to deal with overseas returns—our local team takes care of everything quickly and efficiently. ▸ Protect Your InvestmentBuying from an authorized dealer ensures you’re getting genuine products, full warranty coverage, and expert support. Ask yourself—is saving a few bucks worth losing all that? Choose wisely. Buy from Frankies BrandBeast today!
$24.00


